Each email account comes with a predefined limit for storing messages on the server. When this quota is reached, all new emails will be rejected and sent back to the sender. You can adjust your email quota for any email accounts by accessing your cPanel:
- Log in to your HostPapa Dashboard.
- Click on My cPanel. If you have more than one domain associated with your HostPapa account, click on the appropriate domain link, then enter your cPanel password if required.
- Click on the Email Accounts icon.
- Locate the email address with the full mailbox in the list.
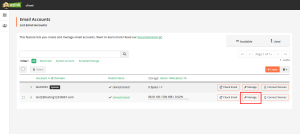
- Click Manage. A new page will appear.
- From the list, find the Storage field and enter a new quota* or Allocated Storage Space.
- Scroll down and click on the Update Email Settings button. The new quota will be saved and will go into effect immediately. You can also log into your mailbox via Webmail and delete emails you don’t need.
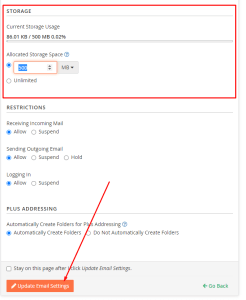
*The quota value shouldn’t exceed 500MB for Start, Plus and 1000MB for Pro and Ultra. If you need more storage, please check out our dedicated email offering or VPS, where you can host larger email boxes.
If you need help with your HostPapa account, please open a support ticket from your dashboard.
