While the design of your AbanteCart store’s pages is managed via general layout settings, you can create a custom layout for individual products, categories, manufacturers and content pages. In this article, we’ll show you how to edit the AbanteCart page layout.
How to create a custom product page
Using the admin sidebar, click Catalog > Products to view a list of your products.

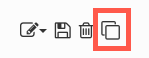
Before editing a product’s page layout, it may be a good idea to work on a copy of the product record (called a clone in AbanteCart) instead of the original. To clone a product, simply select the Clone icon.
To edit the product page layout, select the Edit icon, then choose Page Layout.
The toolbar near the top of the page provides shortcuts to various customization tasks.

As we haven’t created any custom product page templates, all products are displayed with a default layout. Once a custom template has been saved, it will be available from the Template dropdown menu for easy application to existing and new products.
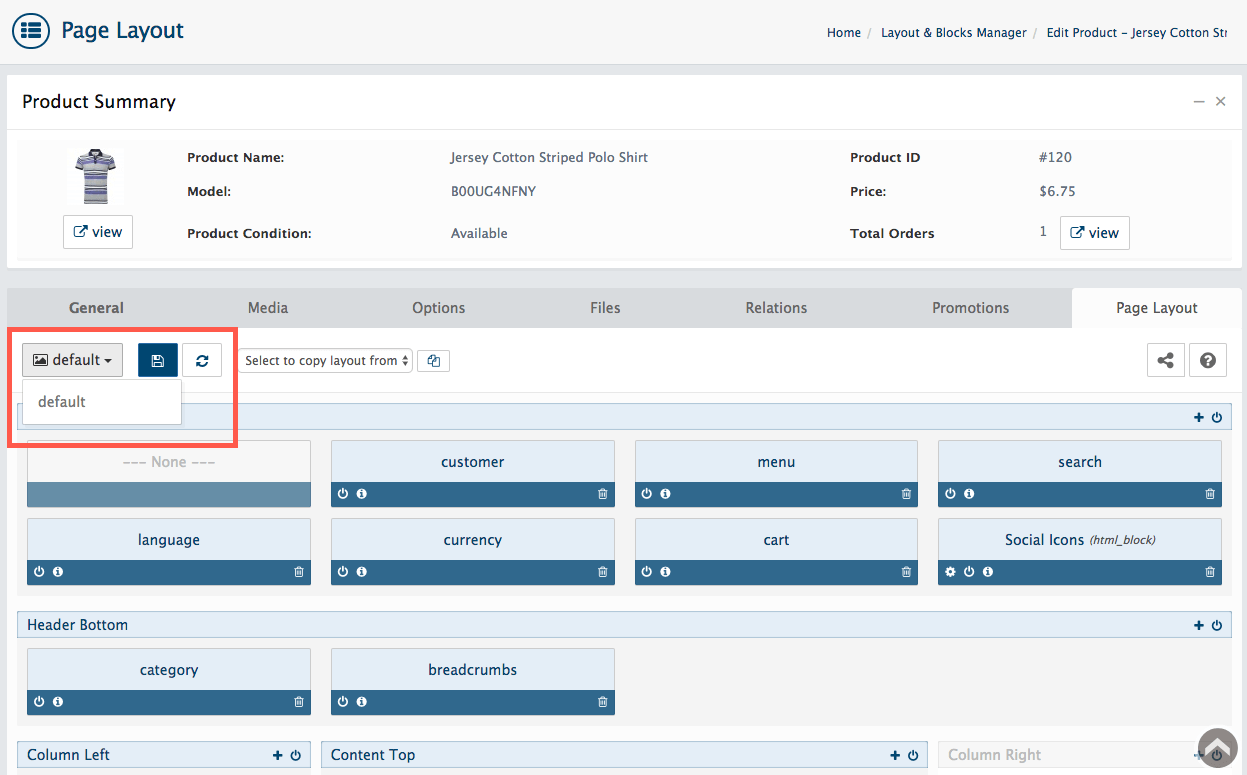
Next to the Template menu, the Save and Reset buttons allow you to save changes to the template layout or revert to the original if desired.

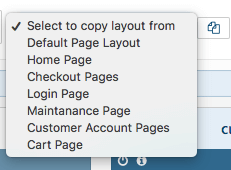
You can use the Select to copy layout from dropdown menu to apply the layout from an alternative page quickly.
You can apply changes to your layout immediately using the Apply button.

How to manage the page layout
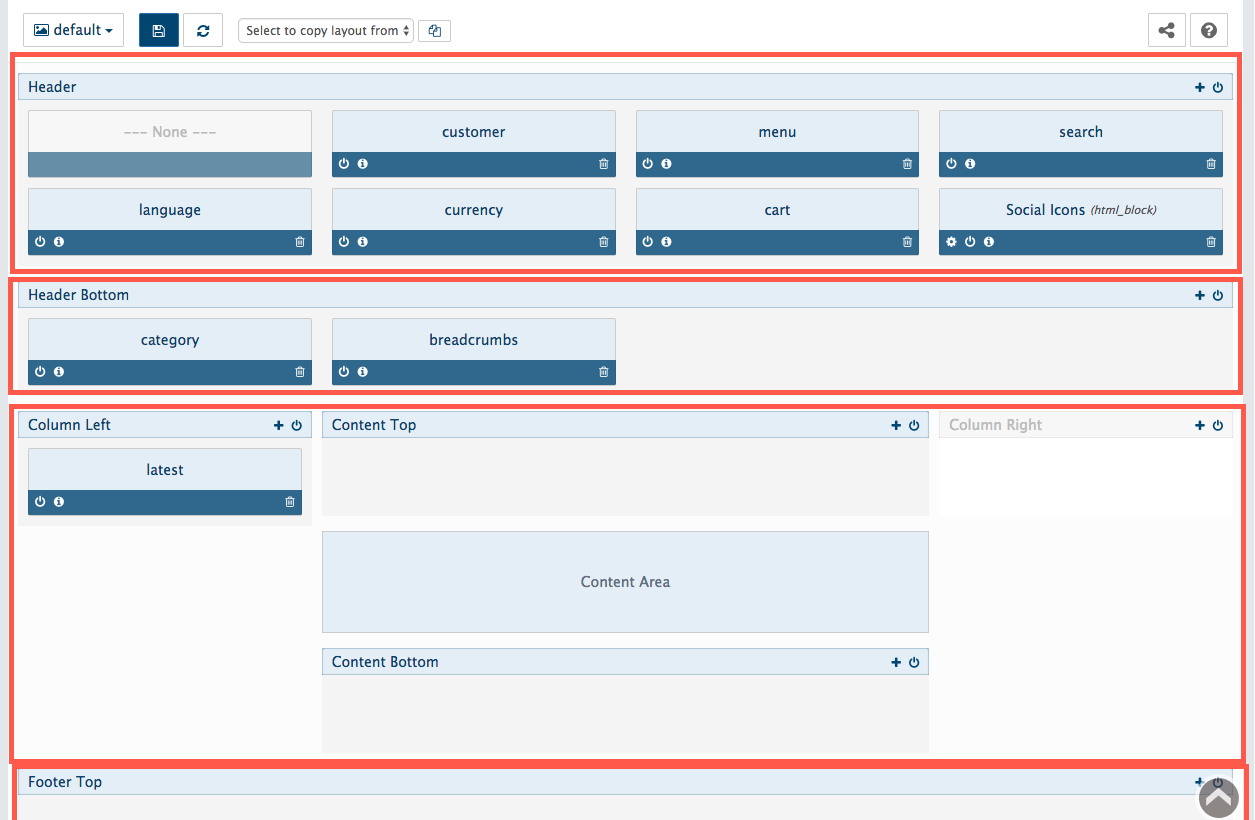
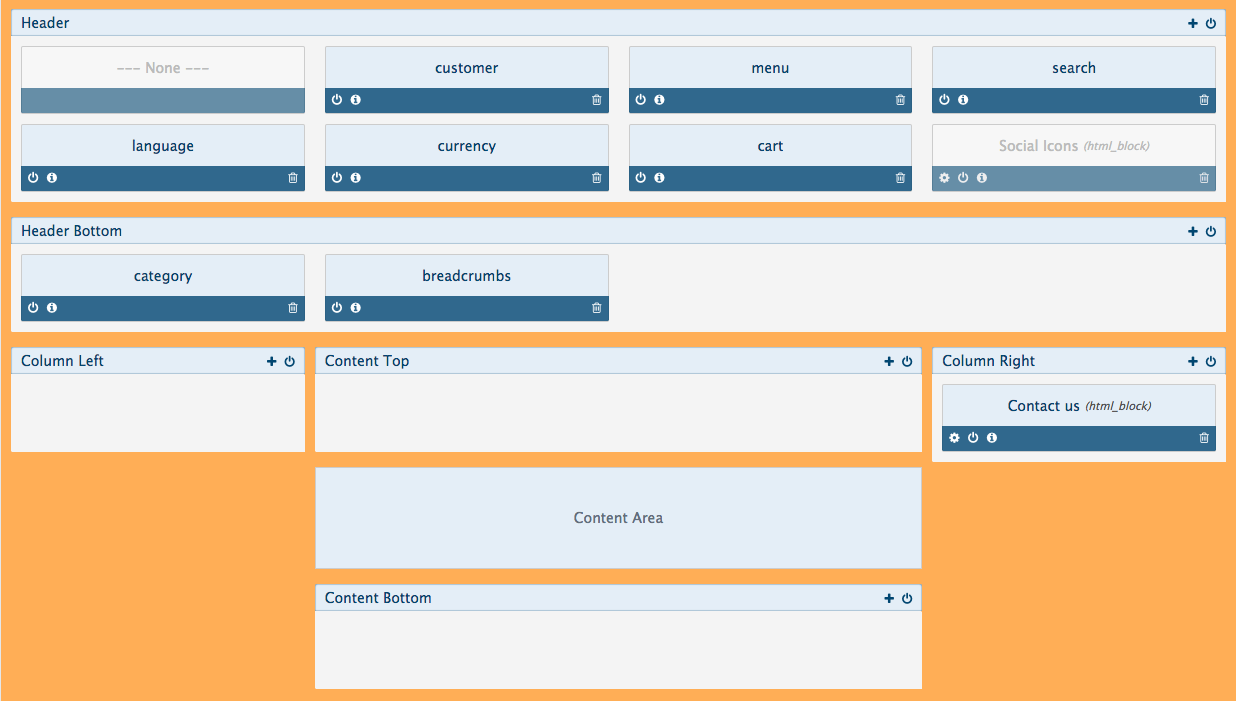
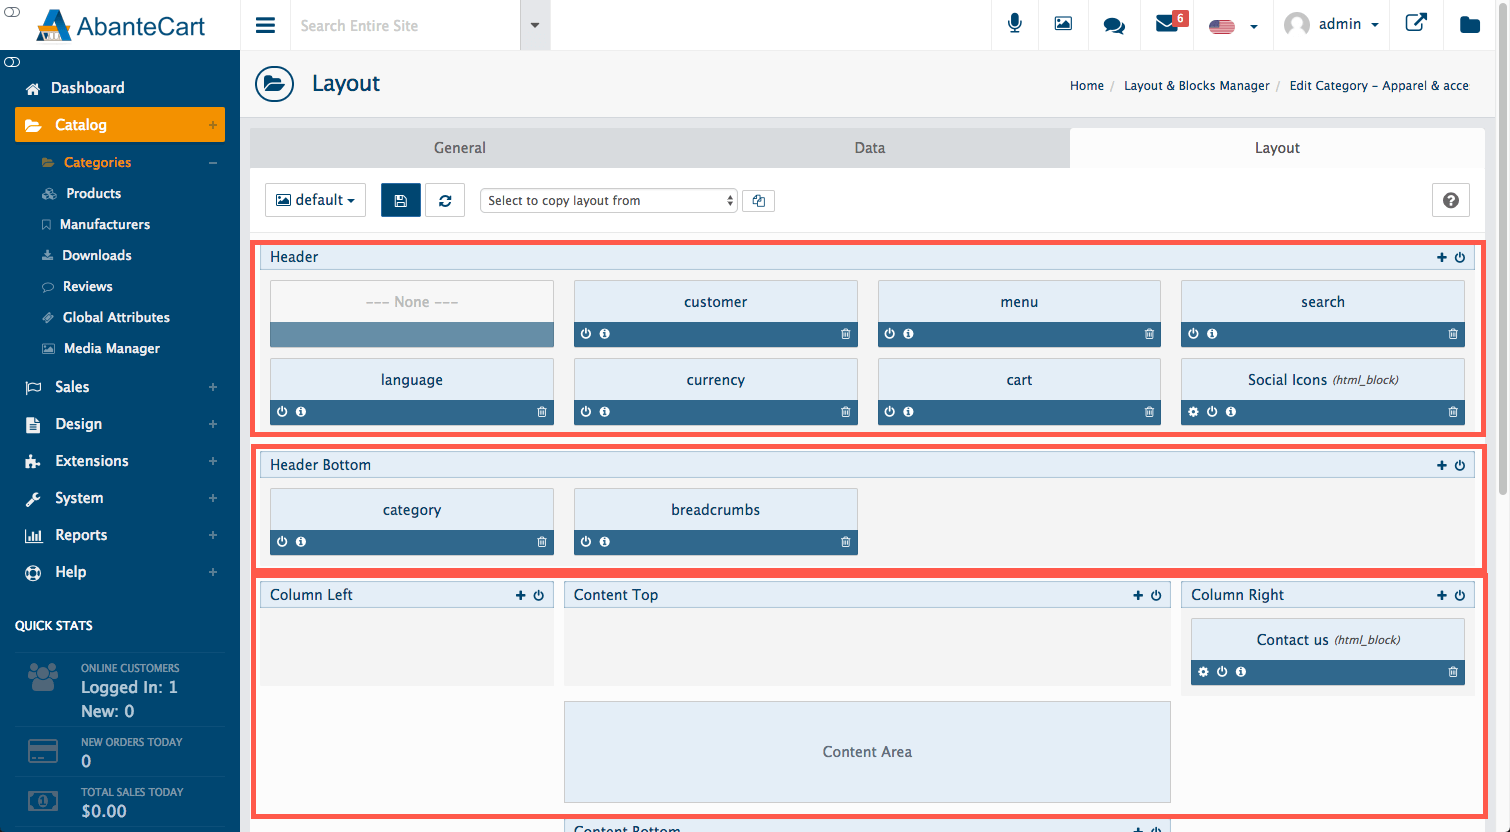
Page layout elements are configured in sections and blocks. You’ll see that the blocks are clustered under fixed sections. They are Header (the top of the page), Header Bottom (the lower section of the header, often used for lower-level navigation), Column Left, Column Right, Content Area, Content Top and Content Bottom (the main body of the page), then Footer Top and Footer Bottom (the lower section of the page).
How to enable and disable blocks and sections
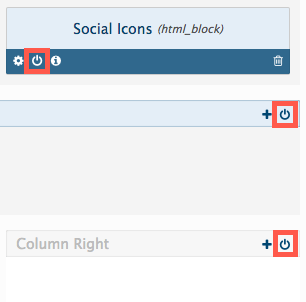
Visible page sections and blocks are highlighted in blue, while disabled sections and blocks (not visible to the customer) are greyed out. Sections and blocks can be enabled or disabled using the power icon in the section header or block footer.
How to add a block to a section
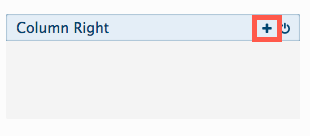
Add a new block to a section by clicking the Plus icon in the section header.
You’ll be presented with a list of blocks that can be inserted into the section.
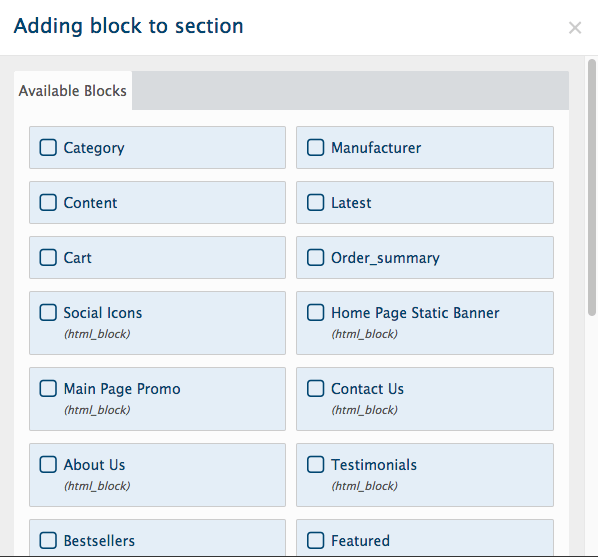
Click the checkbox next to the block you wish to add, and it will be inserted into the section.
Be sure to click Save to lock in the new layout. The page layout may have to be saved before the new block can be enabled.
How to move layout blocks
Blocks can be dragged and dropped within and between sections to change the layout. Simply left-click and hold a block, drag it to a new position, and release it to place it on the page.
Note: Sections are locked and cannot be moved around the page.
How to edit layout blocks
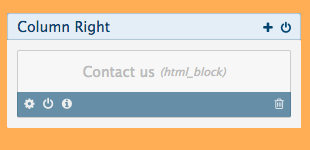
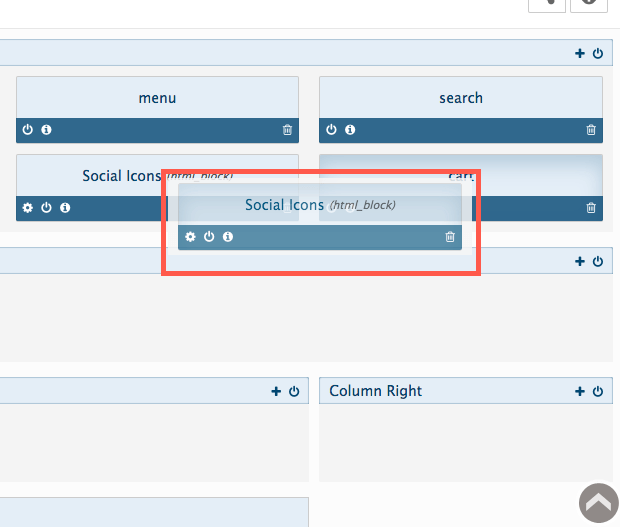
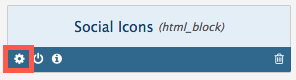
You can edit the HTML code of some layout blocks, but not all. Editable blocks have a Gear icon in their footer.
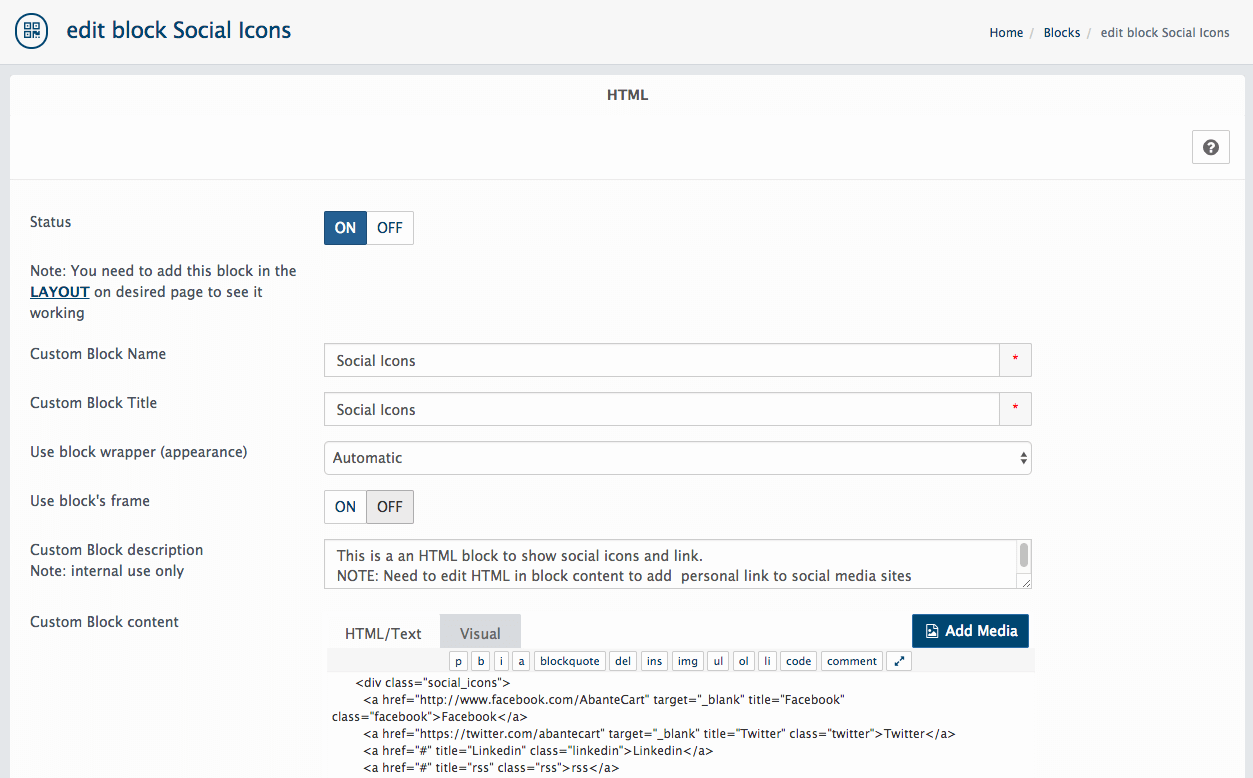
Click the Gear icon to open the block editing page, where you can change the name, title, and appearance of the block and its content. Some knowledge of basic HTML will be helpful if you wish to change the block content.
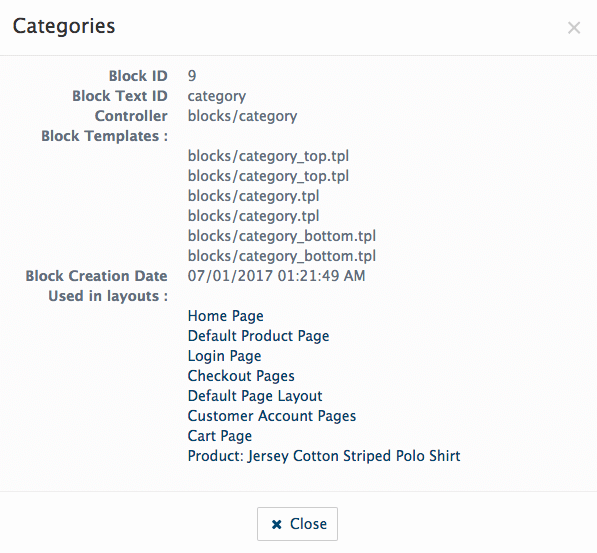
How to view information about a block
If you’d like to know more about a block, click the information icon in its footer.
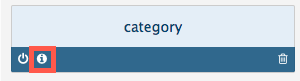
A range of detail is displayed, including the ID number, creation date, and a list of layouts where the block is used.
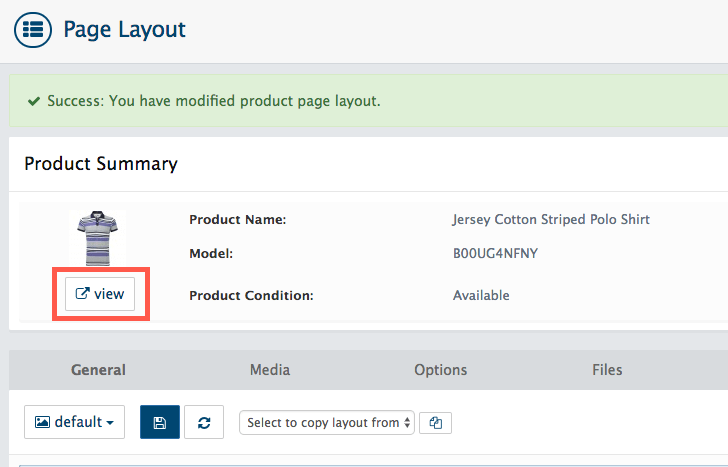
How to preview layout changes
Once you’ve changed the page layout, use the View button underneath the product image to preview your new design.
How to save and reset custom layouts
When you change the page layout, you’ll notice that the page background turns orange, which means it must be saved.
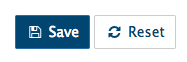
Use the Save buttons near the top or at the bottom of the page to save the customized layout. You’ll see the page background revert to its standard colour.
If you decide you would like to revert to the default layout for your page, you’ll find a Reset button next to the save button.
How to create a custom category page
Using the admin sidebar, click Catalog > Categories to view a list of your product categories.
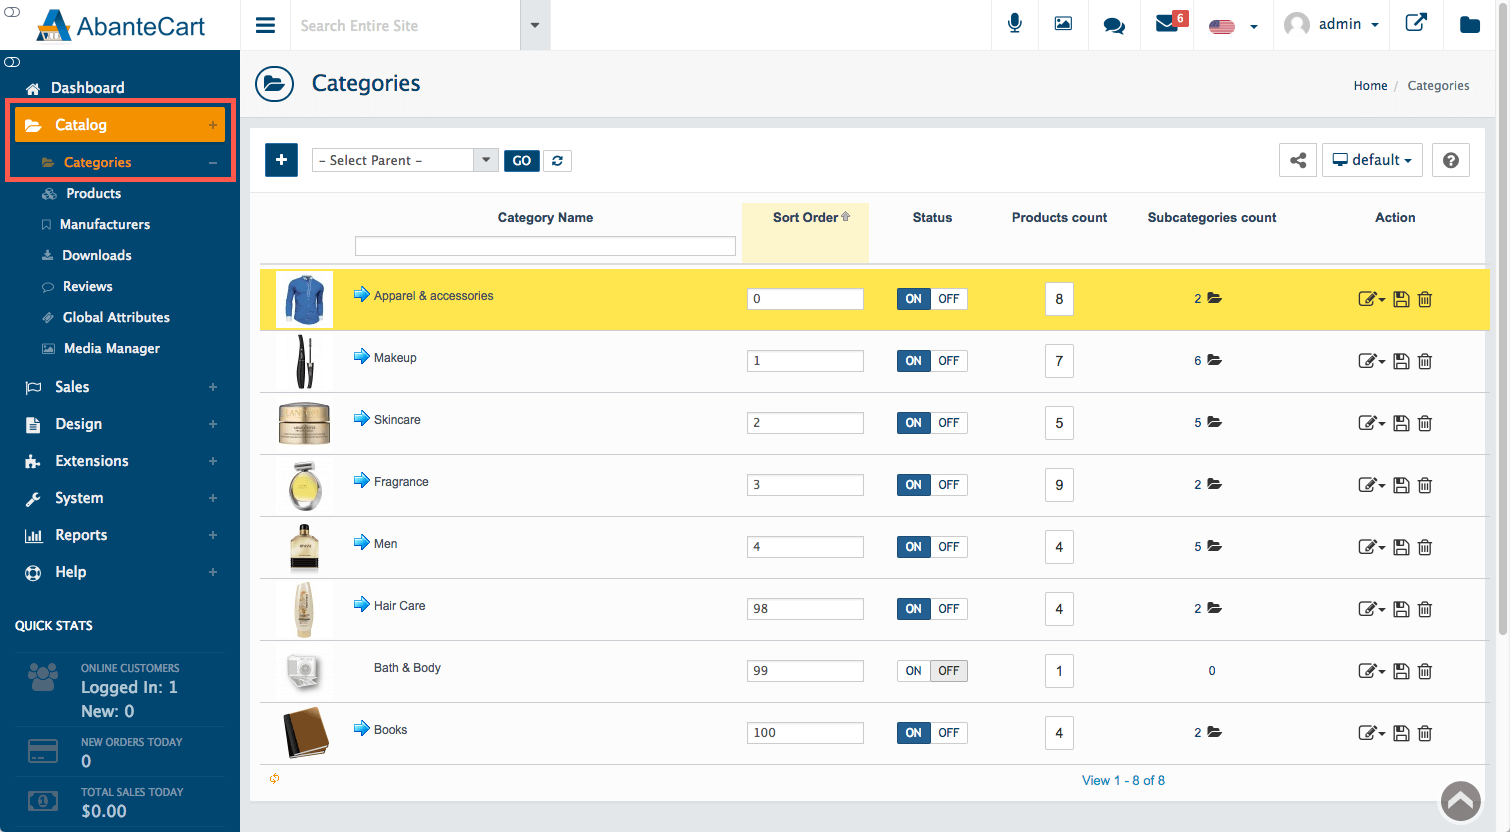
Before editing a category page layout, it’s a good idea to work on a copy of the record rather than the original. To clone a category, simply select the Clone icon.
To edit the category page layout, select the Edit icon and then choose Layout.
How to manage the category page layout
As we saw with product pages, category page layout elements are configured in sections and blocks. You’ll see that the blocks are clustered under fixed sections. They are Header (the top of the page), Header Bottom (the lower section of the header, often used for lower-level navigation), Column Left, Column Right, Content Area, Content Top, and Content Bottom (the main body of the page), then Footer Top and Footer Bottom (the lower section of the page).
Adding, enabling/disabling, editing, and moving blocks in category pages works the same as product page blocks. Refer to the instructions above to create your new layout.
How to create a custom manufacturers page
Using the admin sidebar, click Catalog > Manufacturers to view a list of your manufacturers.
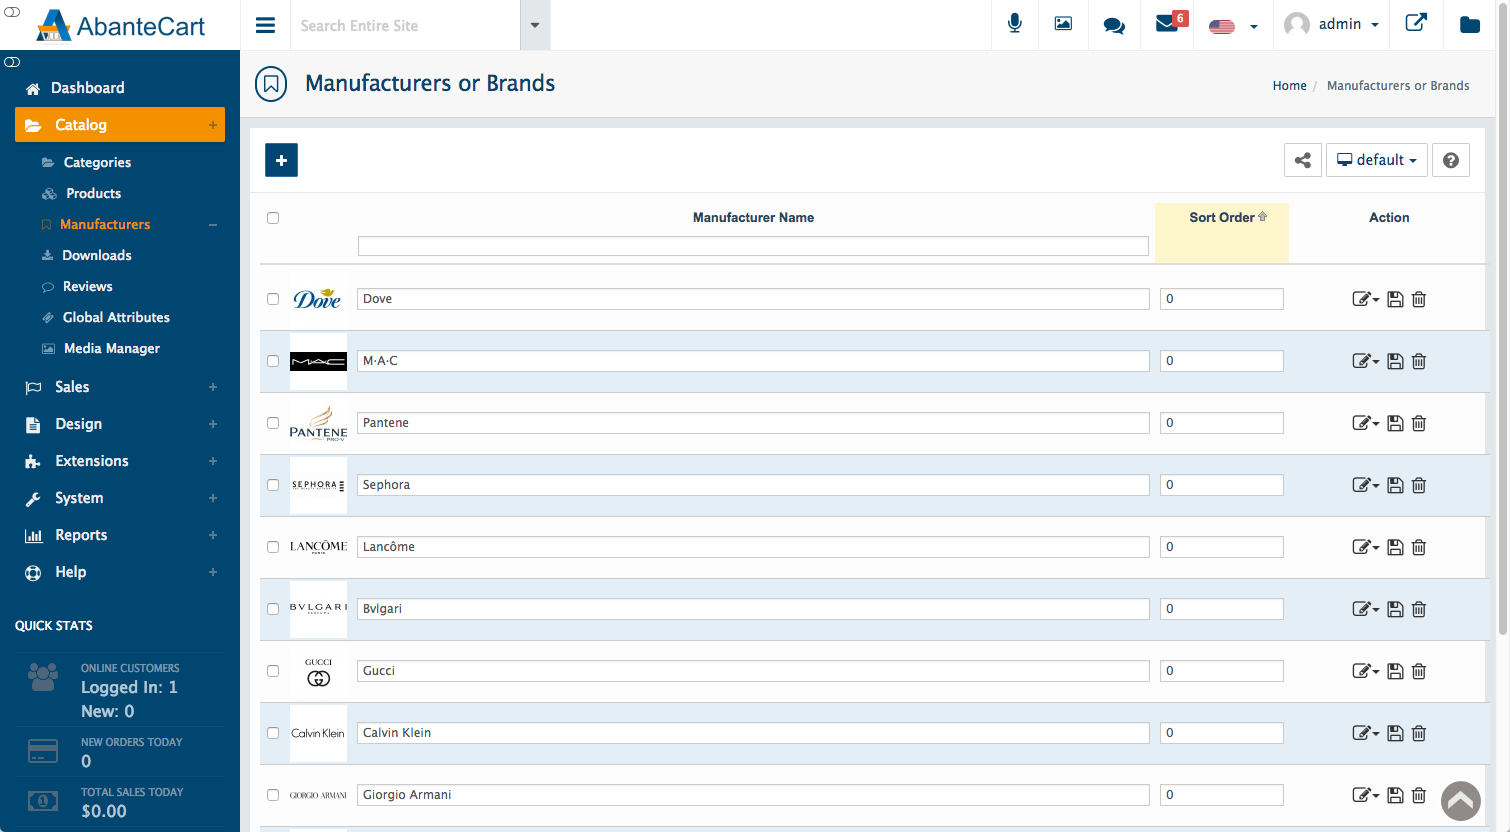
Before editing a manufacturer page layout, it may be a good idea to work on a copy of the record rather than the original. To clone a manufacturer, simply select the Clone icon.
To edit the manufacturer page layout, select the Edit icon and then choose Layout.
How to manage the manufacturer page layout
Page layout elements are configured in sections and blocks. Blocks are clustered under fixed sections. They are Header (the top of the page), Header Bottom (the lower section of the header, often used for lower-level navigation), Column Left, Column Right, Content Area, Content Top and Content Bottom (the main body of the page), then Footer Top and Footer Bottom (the lower section of the page).
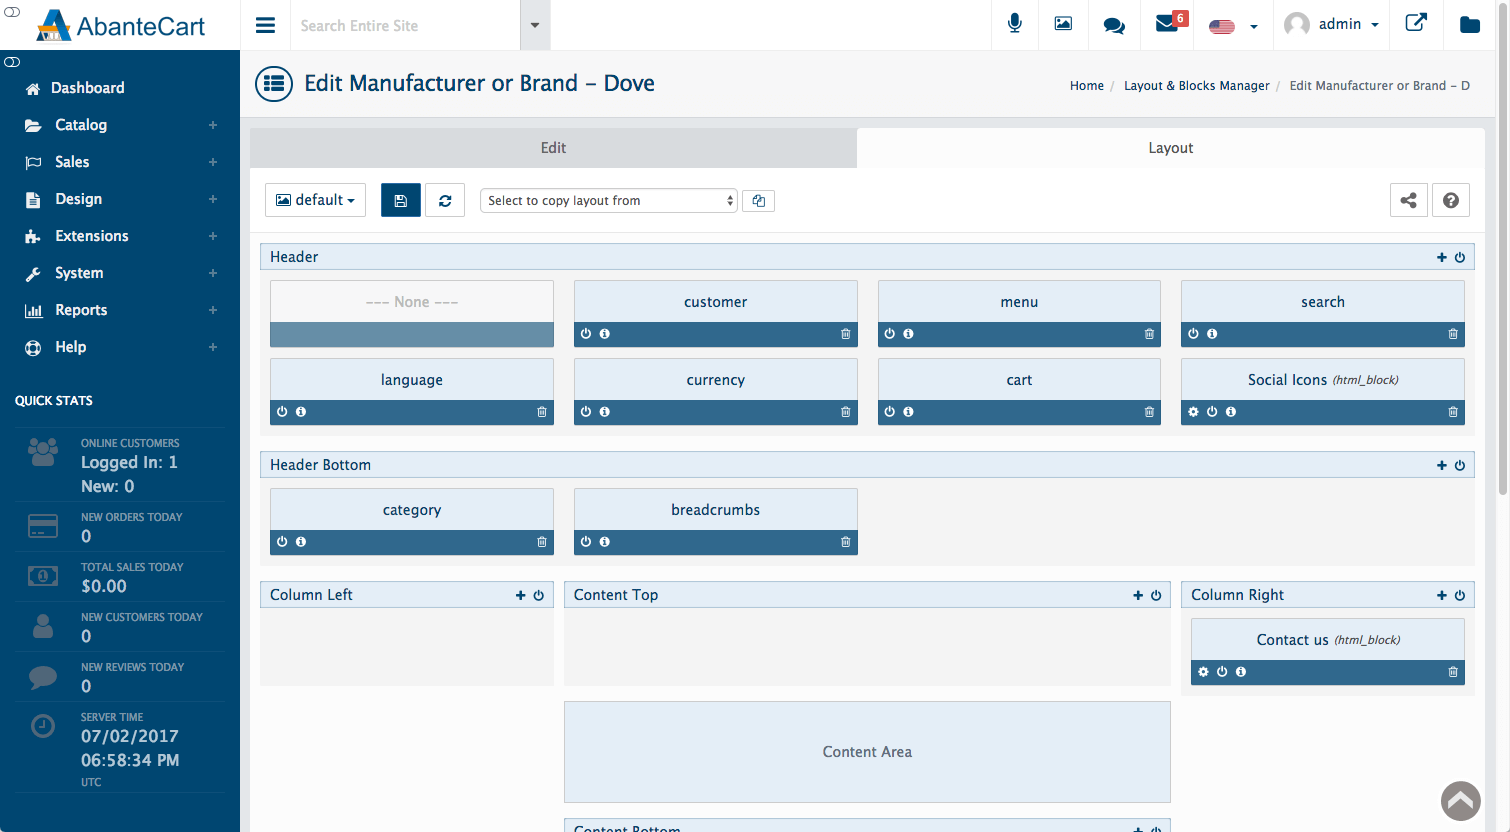
Adding, enabling/disabling, editing, and moving blocks in manufacturer pages works the same as working with product and category page blocks. Refer to the instructions above to create your new layout.
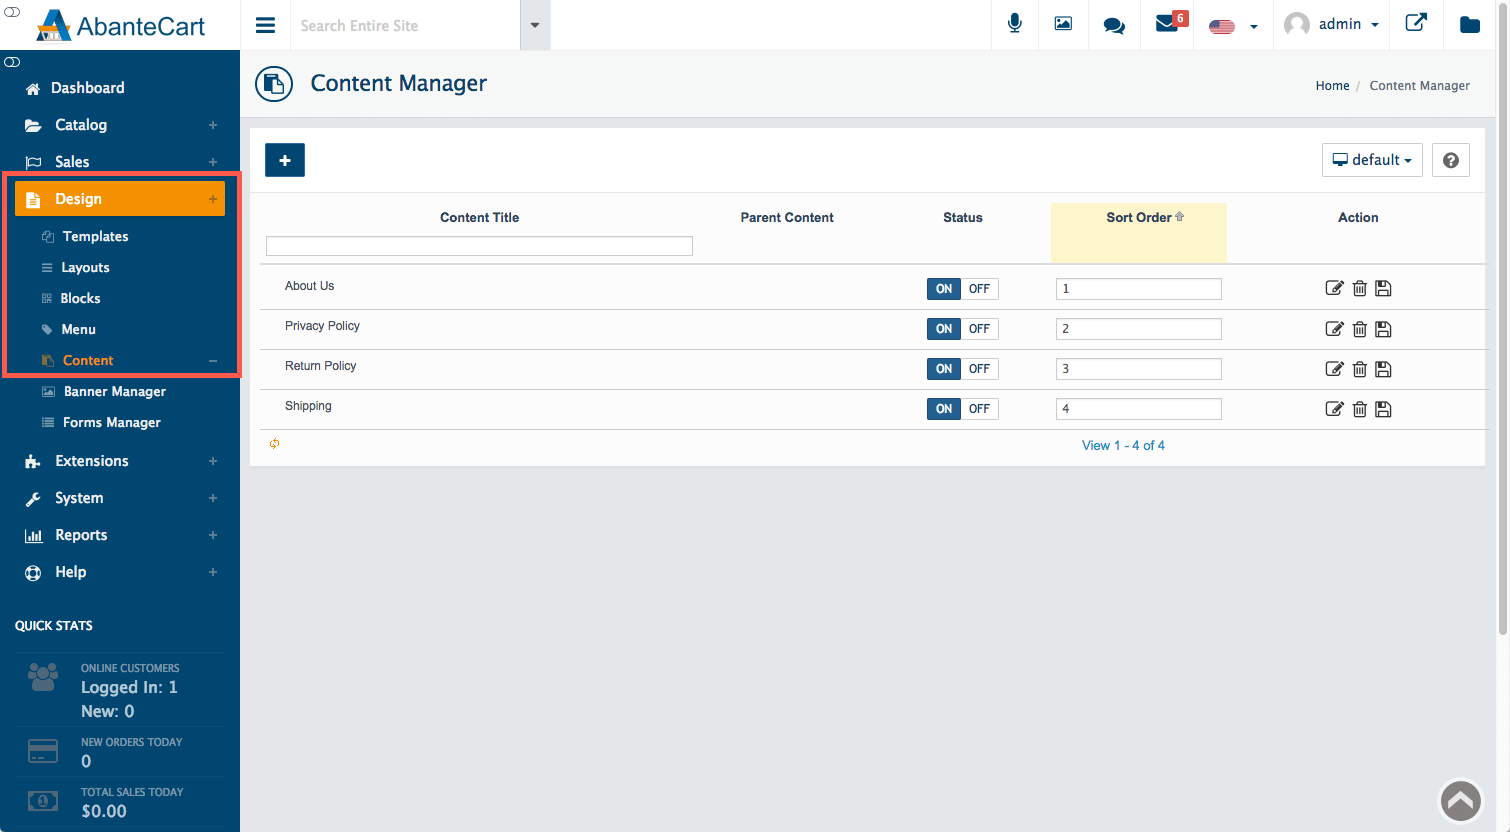
How to create a custom content page
Using the admin sidebar, click Design > Content to view a list of your content pages.
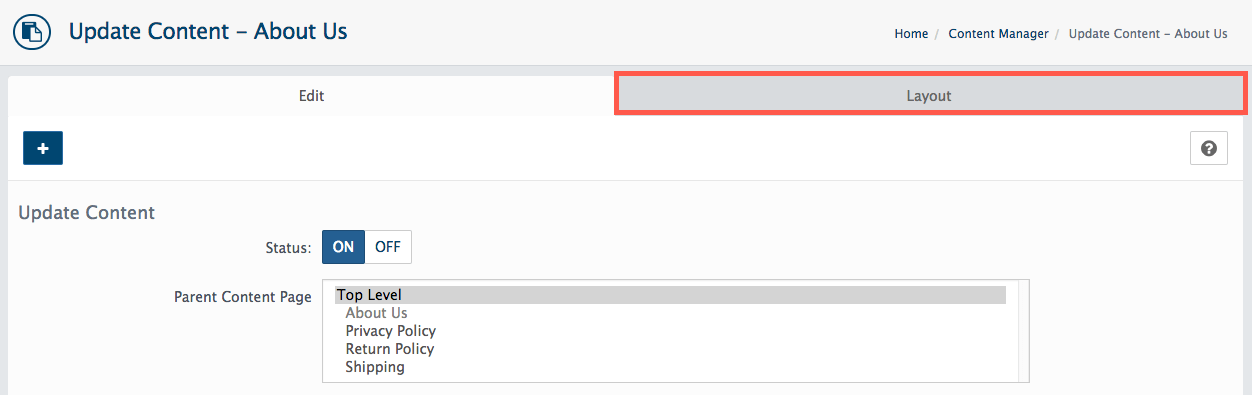
To edit the content page layout, select the Edit icon.
![]()
Once the content page opens, select the Layout tab to continue.
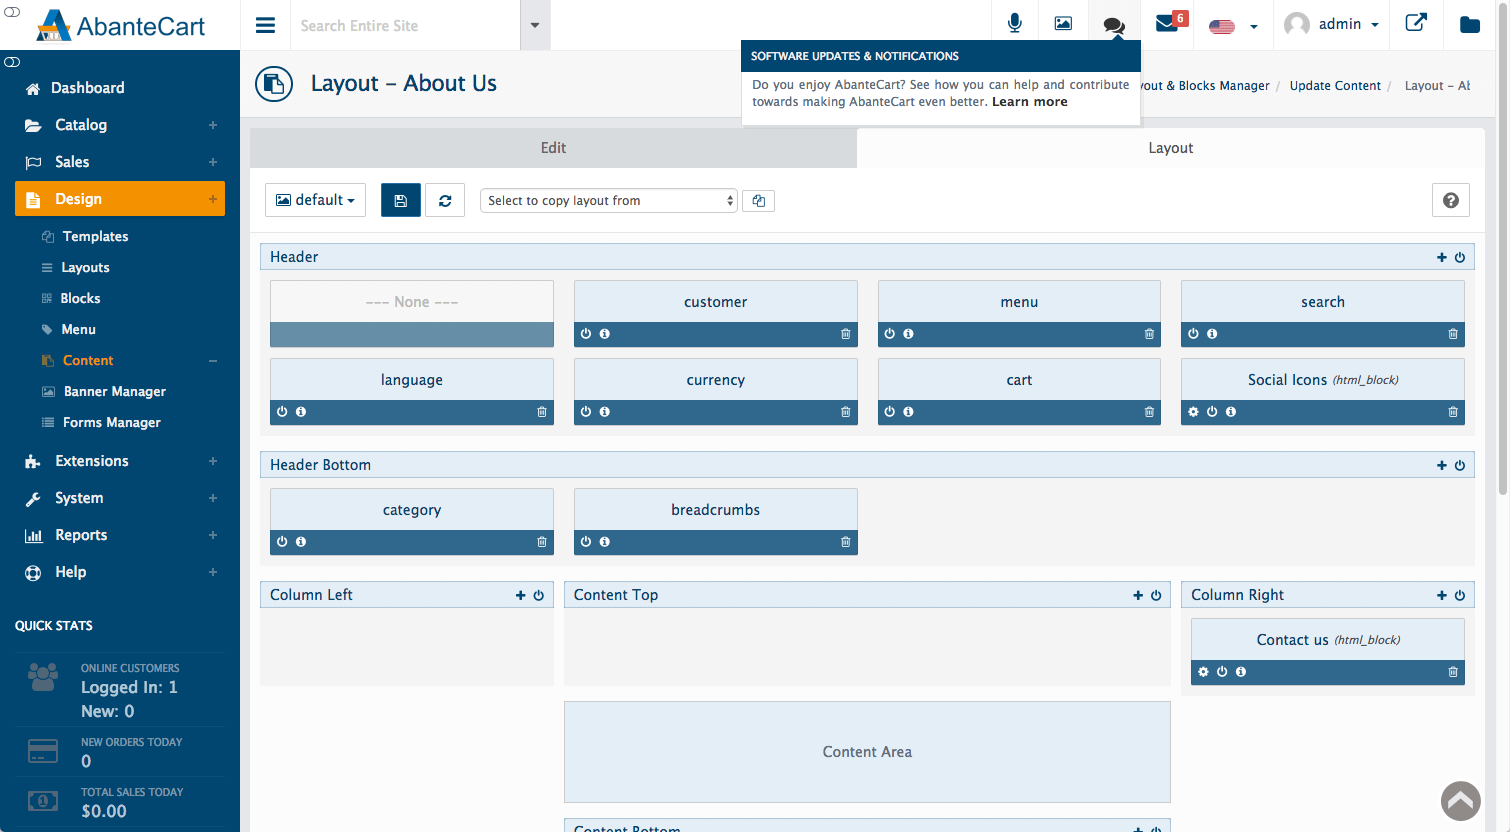
How to manage the content page layout
Page layout elements are configured in sections and blocks. Blocks are clustered under fixed sections. They are Header (the top of the page), Header Bottom (the lower section of the header, often used for lower-level navigation), Column Left, Column Right, Content Area, Content Top and Content Bottom (the main body of the page), then Footer Top and Footer Bottom (the lower section of the page).
Adding, enabling/disabling, editing, and moving blocks in content pages works the same as working with product, category and manufacturer page blocks. Refer to the instructions above to create your new layout.
More information
For more information about AbanteCart, please visit their website or HostPapa’s Knowledge Base.
If you need help with your HostPapa account, please open a support ticket from your dashboard.
