CS-Cart is a powerful shopping cart application that you can easily create and manage a full-featured online store. The storefront and administration panel are web-based, so all you need to manage your store is a web browser and an internet connection.
Before you begin
The CS-Cart shopping cart application is a third-party commercial product. Before you can install it on your HostPapa website, contact CS-Cart to purchase a license and download the installation package to your local computer.
Installing CS-Cart is a straightforward process that doesn’t require technical expertise. We recommend that you read through this article before you begin so you know what to expect during the installation.
You will need the following to complete the CS-Cart installation:
- The CS-Cart installation files and license number you received from CS-Cart
- Your HostPapa Dashboard username and password
Installing CS-Cart
Installing CS-Cart includes three primary stages:
- Create the MySQL database
- Upload the CS-Cart installation files to the server
- Run the web-based installation program
Create the MySQL database
The first step is creating the MySQL database, where the CS-Cart data will be securely stored.
1) First, log in to your HostPapa Dashboard.
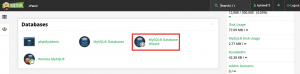
2) Click My cPanel.
3) In the Databases section, click MySQL Database Wizard.
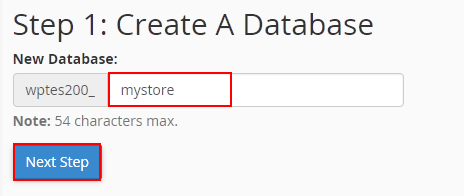
4) Enter a name for the database and click Next Step.
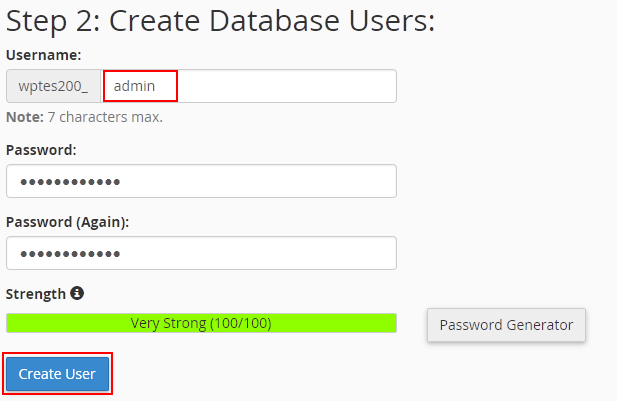
5) Enter a Username and Password for the database. Ensure that you choose a strong password that you will remember or record in a secure place.
6) Click Create User.
7. Select ALL PRIVILEGES to select all the checkboxes and click Next Step automatically.

8. Click Return Home.
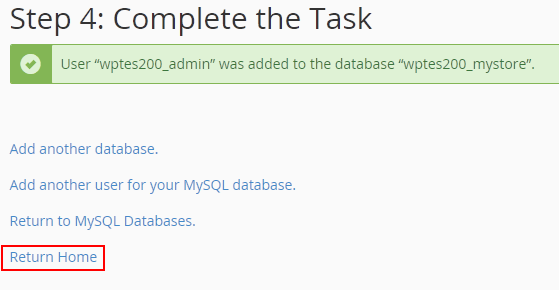
You’ve now successfully created the database and are ready to upload the installation files.
Upload the CS-Cart installation files to the server
Now you’ll upload the installation files to the server, but before you continue, make sure you know the location of the compressed (.zip) installation file that you downloaded to your local computer from CS-Cart. The file is likely called cscart_v4.x.x.zip, depending on which version you downloaded.
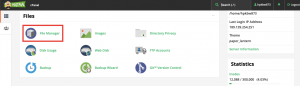
- In cPanel, click File Manager.
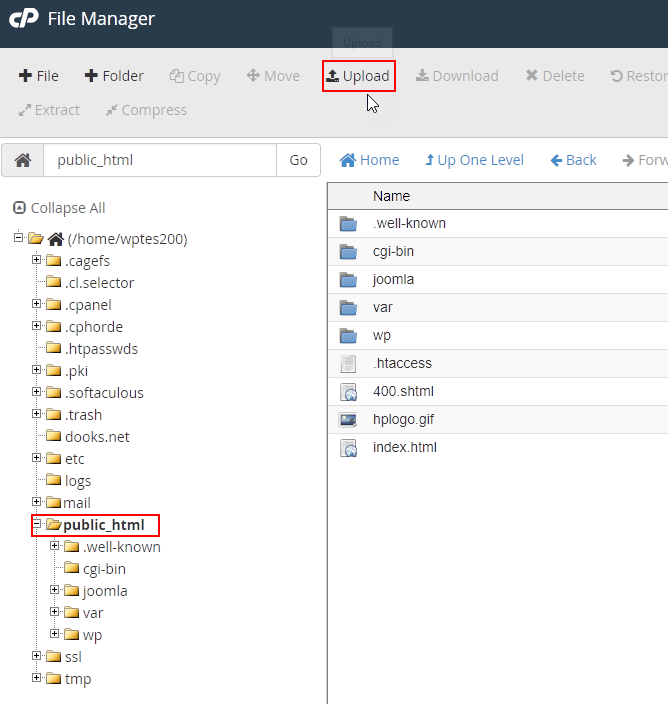
2) In the File Manager directory tree, select the directory that will be the root directory for your CS-Cart store. In most cases, this will be public_html, but it may be different if you have multiple sites or domains. Contact HostPapa Support if you need more information.
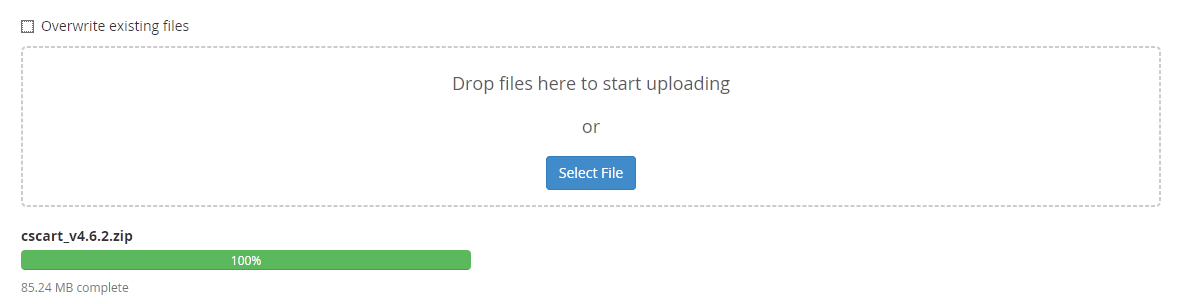
3) Click Upload.
4) Click Select File and select the compressed installation file. The upload may take a few minutes.
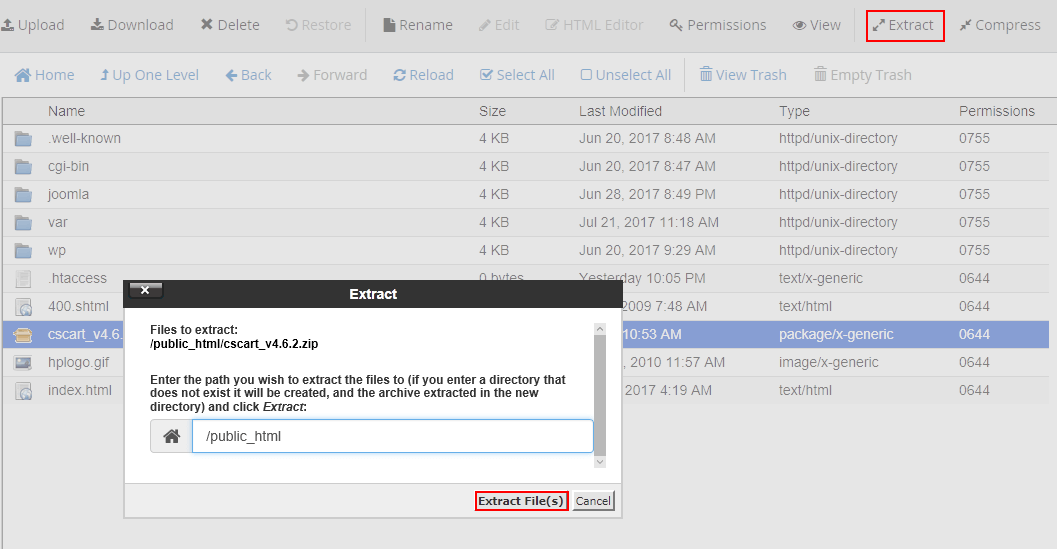
5) When the upload is complete, return to the File Manager. Select the compressed installation file and click Extract.
6) In the Extract box, click Extract File. When the extraction is complete, you’re ready to run the installation program.
Run the web-based installation program
1) Open your website in your web browser. You should see a message stating that CS-Cart is not installed and an install link. Click the install link.

Note: You can delete or rename the page in File Manager if you see the default HostPapa welcome page or another page instead of the CS-Cart page. If you don’t want to delete or rename the default page, you can enter the full path to the installation page in your web browser: your_domain/index.php
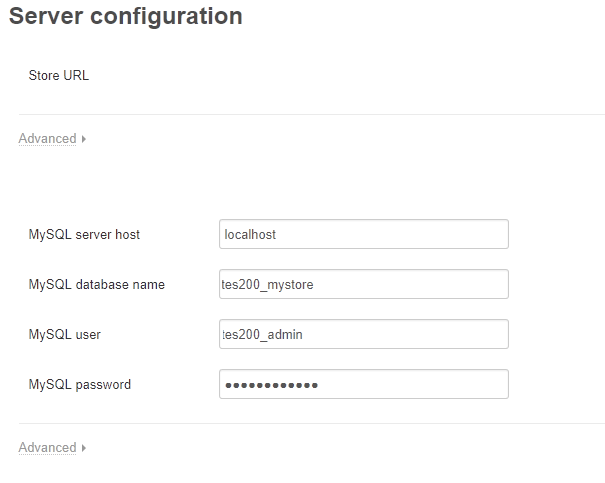
2) Read and accept the license agreement and click Next step. In the Server configuration settings, enter the following:
- MySQL server host – Enter localhost. This is the same server that hosts your website.
- MySQL database name – Enter the database name you chose when you created the MySQL database.
- MySQL user – Enter the database username.
- MySQL password – Enter the password for the database username.
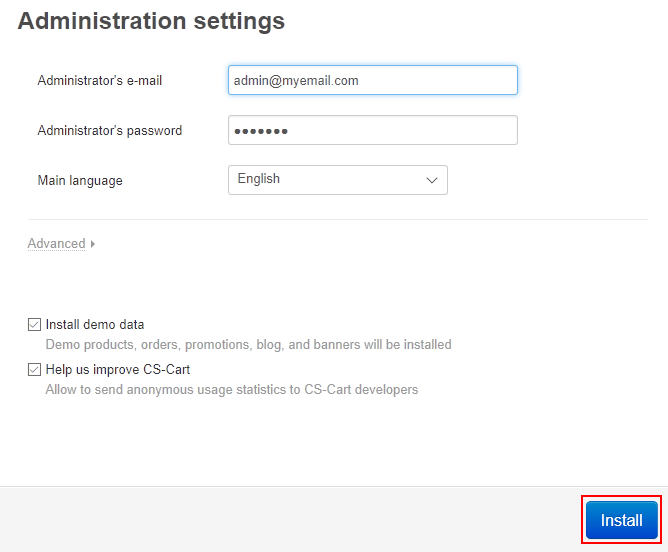
3) In the Administration settings, enter the following settings, then click Install:
- Administrator’s email – Enter your email address. CS-Cart will use this address to notify you about orders and other essential events in your store.
- Administrator’s password – Enter a password. This is the password you will use to sign in to the store admin panel, so ensure it is a strong password and keep it in a secure place.
- Main language – Choose the main language for your store.
- Install demo data – Select this option to see demo data in your store before adding your own. You can delete the demo data at any time.
Help us improve CS-Cart – Select this option to automatically send usage statistics that CS-Cart can use to improve the application.
4) When the installation is complete, choose the correct licensing mode. If you have purchased a license, enter it in the License number.
5) Click Select.
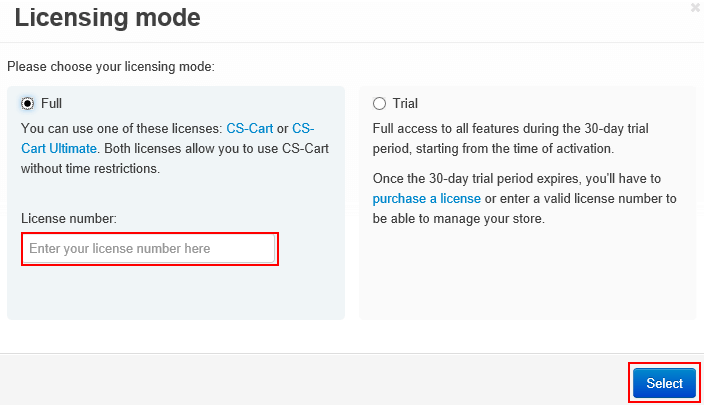
Note: If you see a 500 Internal Server error instead of the licensing mode dialogue box, it is likely due to permission errors.
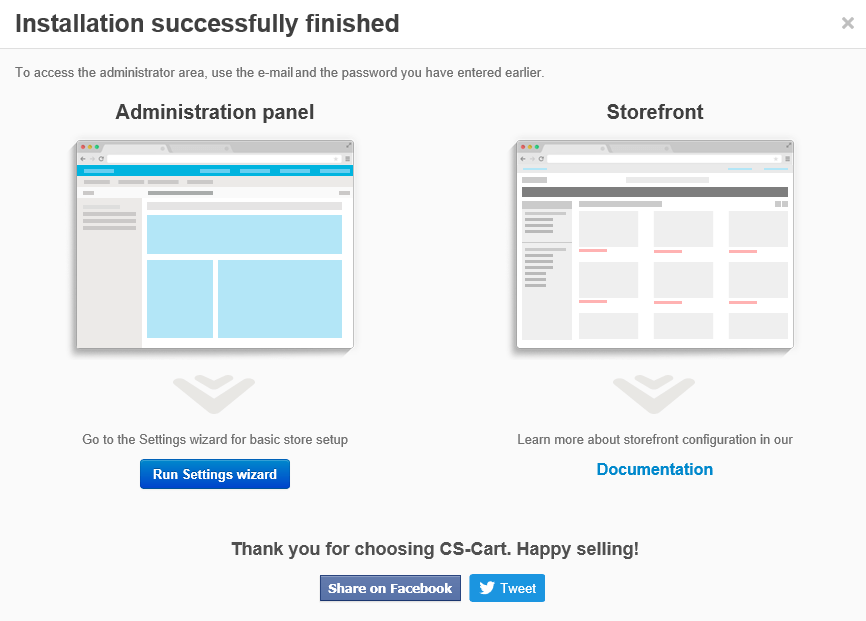
Installation is now complete. You can now go to the administration panel to begin setting up your store or go to the storefront to see how it looks.
If you need help with your HostPapa account, please open a support ticket from your dashboard.
