You can enhance your WordPress site’s security by adding password protection to directories. Unlike the WordPress password protection feature, which requires that a site visitor enters a password to read a specific post, adding password protection to a directory restricts access to the entire directory unless the user enters a correct username and password.
Note that in cPanel, ‘directory’ and ‘folder’ are used interchangeably and mean the same thing.
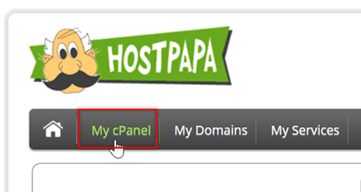
Log in to your HostPapa Dashboard and click My cPanel.
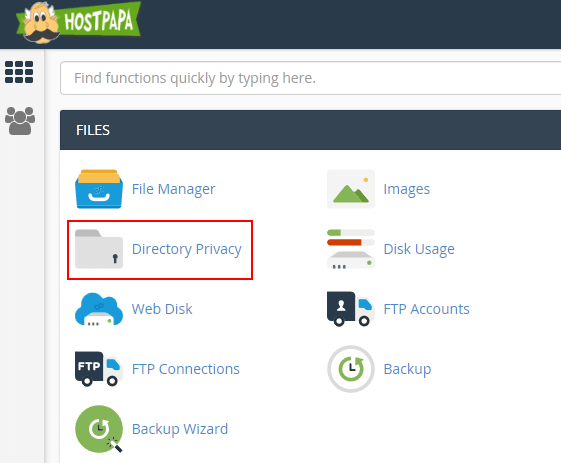
In the Files section, click Directory Privacy.
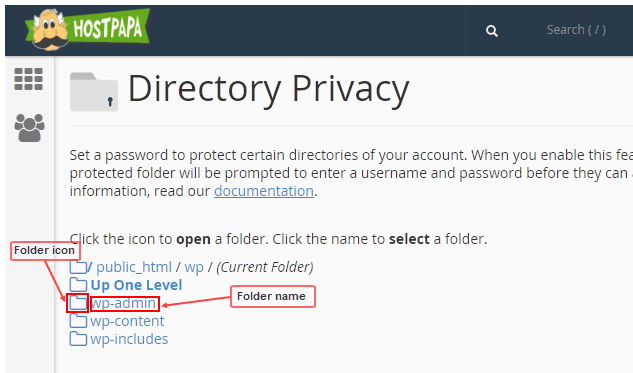
Locate the directory (or folder) you want to protect. Click the folder icon to open the folder and view its subfolders or click the folder name to password protect that folder. In this example, we’re password protecting the wp-admin folder, so we click the wp-admin folder name.
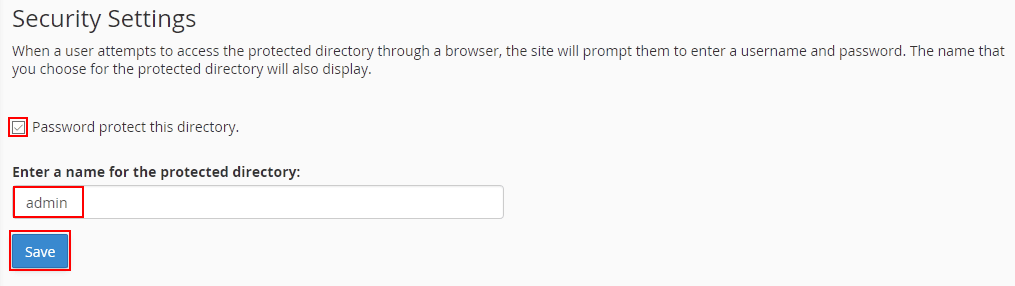
In Security Settings, enter the following and then click Save.
- Password protect this directory – Select this check box to enable password protection.
- Enter a name for the protected directory – Enter a name. This name doesn’t have to be the same as the folder name.
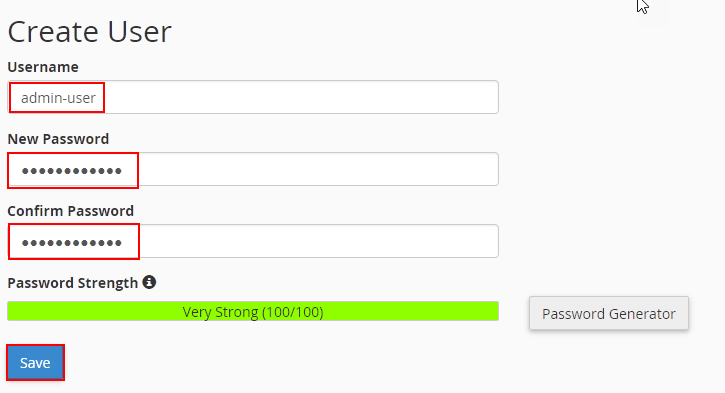
In Create User, enter the following and click Save.
- Username – Enter a username. This is the username that will be required to access the directory.
- New Password – Enter a password.
- Confirm Password – Enter the password again.
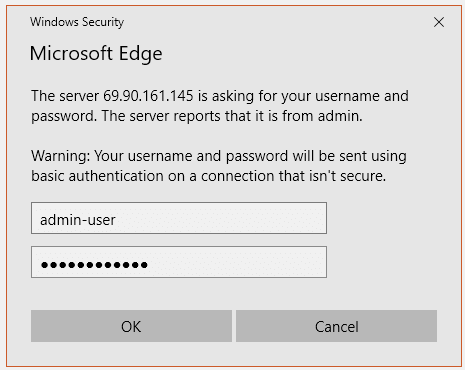
The directory is now password protected and your site visitors will have to enter the username and password before they can view the pages in the directory.
If you have any questions or need help, contact HostPapa Support by opening a support ticket. Details about how to open a support ticket are here.
